How to make a Totoro. [the wrong way]
This was not the best way to do this.. knowing what I know now, I can NOT recommend anyone making it this way. FIBERGLASS IS NOT THE ANSWER. [try Fosshape] OR DO IT LIKE THIS. Someone randomly messaged me asking how much he weighed and showed me theirs. They did it with a series of horizontal hoops. Check it out. It's much more practical.
This whole thing was a long and painful process of trial and error, and because it was sooo painful, I walked away from this thing multiple times. It was ridiculous how many problems I ran into. ALL and ALL, It took just over a year to complete. Super slow start with the planning, and it picked up speed after the fiber-glassing was all done. It was a labor of love.
This whole thing was a long and painful process of trial and error, and because it was sooo painful, I walked away from this thing multiple times. It was ridiculous how many problems I ran into. ALL and ALL, It took just over a year to complete. Super slow start with the planning, and it picked up speed after the fiber-glassing was all done. It was a labor of love.
|
Step 1.
Get the shape right. The first attempt was with a balloon, paper mache, and expandable foam. It did not work very well. It ended up using 2 grande beach balls [bought off ebay], lots of masking tape, and foam chunks. The head is a mid sized beach ball with some facial features taped on it. The body is an extra large beach ball with an foam arm shape taped on it. I don't have any digital pictures of it [because my computer crashed]. But, it's basically foam shapes taped onto some beach balls. |
|
Step 2.
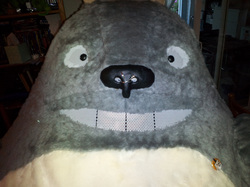
Fiberglass as needed. It smells sooooo bad, do it outside with fans blowing and a filter mask. I started with the head: fiber-glassed it, hollowed it out, trimmed the edges, placed it on top of the body ball, and continued fiber-glassing. There is some wire in around the bottom edge for structural support. I used wire mesh [painted white] for the eyes and mouth. The body is in 2 pieces, so it's more of a pill shape and it collapses a little [for easier transportation]. |

|

|
Step 3.
Sanding & Foam. This is where the work is. Sanding fiber glass is hell. Even with a mask and goggles, the fiber dust is incredibly abrasive [it makes your skin rash]. I spent many hours out there with a sanding tip on a rotary tool, smoothing out all the little burs. I then used expandable foam to smooth out the neck slant and arm curvature. There are a bunch of holes on the head for ventilation, the fur covers them when its all done. << This is probably the best in-process picture I have. I lost years worth of photos when my old computer crashed, all of the other pictures came from phones. |
|
Step 4.
Lace it together. Hang it up by the ear holes, drill a bunch of holes, and lace the 2 halves together. After this step, I took a long break. I think it was hanging up like that in the garage for over 4 months. [during the winter] There are straps that run front to back, so the weight of the structure lands on the shoulders [like a backpack]. Using spray adhesive, I lined it with felt [I thought that might lessen the echo, but it also insulated]. |

|
|
Step 5.
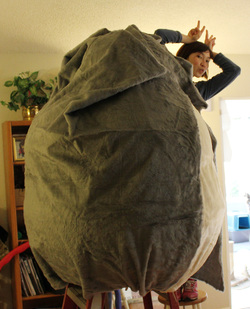
Fur. 4 yards of grey, and 1 yard of white. I brought the shell into the house and perched it on top of a ladder [which I later replaced with a crappy 80s tripod]. I measured the height on center back, and cut the grey fur into long pieces that length. The center back seam is the only seam running the entire height. I trimmed away extra fabric at the top, and used the scrap to make the shoe covers, ears, and arm sleeve. From there, everything was pinned and hand-sewn. For 2-3 days, this thing was just a massive-faceless-Easter-egg taking up the whole living room. |
|
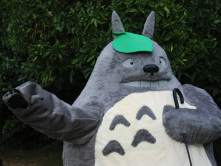
Step 6.
That's about it for the hard part. The arm has loops of plastic-boning in it to keep it round, the palm has a little slit so I can stick my fingers out if needed. The underarm pit is open, to make it easier to carry, and also for ventilation [it gets hot in there]. The nose is a little piece of wonderflex, the eyes are half sphere buttons. Then the feet [padded boots], and the fuzzy pants.. and the tail. I'll say it again.. Fiberglass was not the best way of doing this.. I do not recommend anyone follow this tutorial. The end structure was poorly ventilated, heavy, bulky, & limited vision. But it looks cool.. 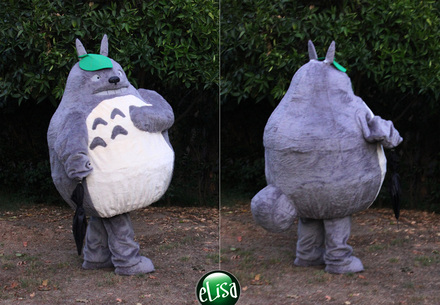
|
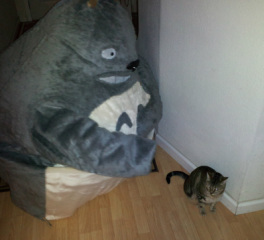
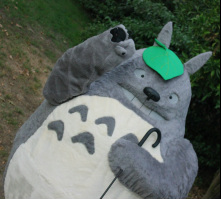
The cat didn't care for it ^_^
I don't expect anyone to follow this tutorial, there are definitely better ways of doing/making something like this.. Feel free to ask questions. |