Hats, Makeup, and Sewing
I am not a fan of vlogging, but I do think youtube is the greatest collection of human knowledge that the planet as ever known. Particularly the makeup and fabrication tutorials.
Every time I think I want to make something, I consult the internet to see how other people have done it. Occasionally, I find that no one else has done it, but 95% of the time, there’s already pictures and videos of someone else’s process.
Talk about Makeup:
I have not ever considered myself to be a good makeup artist. But after a few years, I think I should say something on the topic.
It takes a bit of practice, and a bit of confidence.
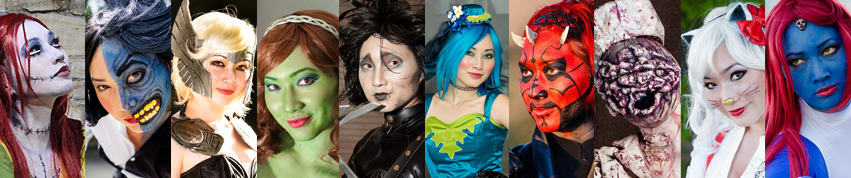
At the start, it was just regular makeup, then it was regular makeup on top of body paint. Then, a few attempts of trial and error, copying contouring techniques I saw on youtube, and studying various face-paint videos, and using a lot of eye liner. I got better.
At some point, makeup artistry is more similar to the technique of painting a picture than it is about the quality of the cosmetics. The application of color itself is more important, so using the top brands isn't important. I've been using the same party store body paint and the same cheap eye shadow palette for years.
Every time I think I want to make something, I consult the internet to see how other people have done it. Occasionally, I find that no one else has done it, but 95% of the time, there’s already pictures and videos of someone else’s process.
Talk about Makeup:
I have not ever considered myself to be a good makeup artist. But after a few years, I think I should say something on the topic.
It takes a bit of practice, and a bit of confidence.
At the start, it was just regular makeup, then it was regular makeup on top of body paint. Then, a few attempts of trial and error, copying contouring techniques I saw on youtube, and studying various face-paint videos, and using a lot of eye liner. I got better.
At some point, makeup artistry is more similar to the technique of painting a picture than it is about the quality of the cosmetics. The application of color itself is more important, so using the top brands isn't important. I've been using the same party store body paint and the same cheap eye shadow palette for years.
Talk about Hats: Headgear.
I am not the best prop maker around, but I have tried my hand at costume hat-making with varying levels of success.
I’ve made a few box-heads. Examples: Canti, Pyramid Head. [mostly cardboard]
I’ve made a few masks. Examples: Dark Nurse, Doof warrior. [mostly plaster]
I’ve made a few hats. Examples: Twi’lek, Maleficent. [mostly foam] My theater work has given me a bunch of hat building experience.
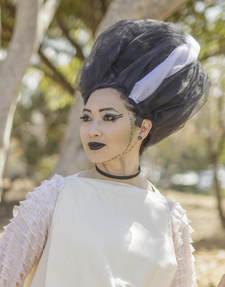
And something new: wig-hat. Hats that are worn as wigs, but not the same texture as hair. At some point, a heavily glued wig will become hat-like, but when does a hat become wig-like? I tried to make a wig that doesn’t look like a wig. Wig-hat: Bride of Frankenstein
As you can see, it’s tulle mesh fabric. No actual wig hair. I probably could have made it all out of paper, but that sounded a bit too delicate. Craft-foam would be better, it is durable, flexible, doesn’t rip easily, water resistant; you can carve it, spray paint it, hot glue it. It’s great for costumes. But in this particular case, fabric was faster.
With costume hats, I think color and texture is the most important thing to attain. Cover it in fabric, or colored duct-tape, or layers of paint. Anything to hide the seams to make it look like 1 complete object. It doesn't have to be perfect since photos are rarely close enough to see the imperfections. and Preferably something lightweight and flexible. It makes no sense to wear a heavy /fragile hat.
I am not the best prop maker around, but I have tried my hand at costume hat-making with varying levels of success.
I’ve made a few box-heads. Examples: Canti, Pyramid Head. [mostly cardboard]
I’ve made a few masks. Examples: Dark Nurse, Doof warrior. [mostly plaster]
I’ve made a few hats. Examples: Twi’lek, Maleficent. [mostly foam] My theater work has given me a bunch of hat building experience.
And something new: wig-hat. Hats that are worn as wigs, but not the same texture as hair. At some point, a heavily glued wig will become hat-like, but when does a hat become wig-like? I tried to make a wig that doesn’t look like a wig. Wig-hat: Bride of Frankenstein
As you can see, it’s tulle mesh fabric. No actual wig hair. I probably could have made it all out of paper, but that sounded a bit too delicate. Craft-foam would be better, it is durable, flexible, doesn’t rip easily, water resistant; you can carve it, spray paint it, hot glue it. It’s great for costumes. But in this particular case, fabric was faster.
With costume hats, I think color and texture is the most important thing to attain. Cover it in fabric, or colored duct-tape, or layers of paint. Anything to hide the seams to make it look like 1 complete object. It doesn't have to be perfect since photos are rarely close enough to see the imperfections. and Preferably something lightweight and flexible. It makes no sense to wear a heavy /fragile hat.
|
|
|
Talk about Sewing 101.
I’ve been sewing costumes for over 15 years [ever since middle school] , and I feel like it’s my general area of expertise.
I used to like making things tight fitting, then I moved on to making things look more tailored, then I started making things flowy/poufy with adjustable belts. I used to like complicated styles, but now I have very practical construction ideas. Overall, I think I’ve become more efficient with the wear-ability of my costumes. Easier to make, easier to adjust, and more comfortable to wear.
To avoid having piles of spare fabric scrap, my ultimate sewing goal is to utilize all the fabric, so there aren’t any substantial bits remaining. I usually find flaws with store sewing patterns because they have unnecessary seams, which creates weird little scraps of fabric which would not have existed if the pattern pieces were conjoined.
I also think larger pattern pieces are easier to work with, because you can see how they’re supposed to connect, versus smaller pieces that take precision assembly to make functional. The more pieces there are, the more likely it is to have an error with the assembly [the wrong edge sewn in, or misaligned, or unsymmetrical].
Lately, I’ve started leaving visible seams in my clothing for easy modification. Like a large seam that makes alterations easier later on, or exposed darts, or wide seam allowances, or an area of overlap where moving a button would significantly alter the sizing. People forget that taking an inch out of a garment is a lot easier than adding one in; so all garments should be constructed slightly oversized, and then tailored down to fit.
In this particular outfit, Halloween dirndl, the back railroad style zipper has nearly 2 inches of fabric extra on both sides. So if I become thicker or thinner, I can simply move the zipper out, or add another tuck in.
Speaking of using fabric more efficiently, see my Halloween dress for an idea of what you can make when you only have a half yard of fabric. This type of problem does come up for fabric hoarders who can’t seem to DO anything with that last half yard scrap, but don’t want to throw it away.
The front panel on a dress, and matching straps, requires exactly 1 half yard of fabric.
|
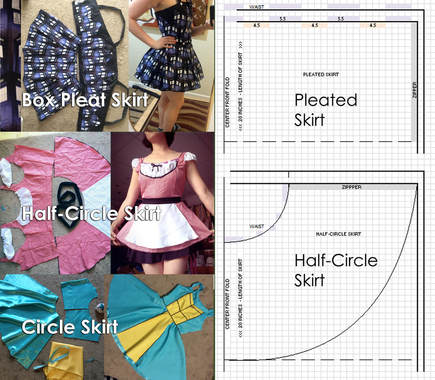
Another example is : Circle skirts, which are easy to make, but not very easy to adjust if your waist size fluctuates; on pleated skirts, however, the waist size is easier to adjust, and it uses the fabric more efficiently [less scrap, because it’s a rectangle]. Both are great styles of skirt, and will be wearable for decades, IF you remember to make it a little oversized from the start, so that you never outgrow it. See the Picture.
IF you like math, Pleated skirts will be great. Fabric is usually 45-60" width. Then you subtract your waist measurement from the width, and divide that by the number of pleats you want [usually 6-12]. EXAMPLE: If you have 60” width fabric - 33” waist = 27” / 6 pleats = 4.5” . So you’re allowed to have 6 pleats that are each 4.5” wide, evenly spaced roughly every 5”- 5.5”. I like to have them line up with seams on the bodice. So starting at center front, measure out 2.5” and mark where the first 4.5” pleat starts & where it ends, then a distance of 5”-5.5” inches, and repeat. OR if you want smaller pleats. You can always do an even ratio of a ~1” gap, and ~1” pleat. |
|