Heelless Shoes Defy Gravity.
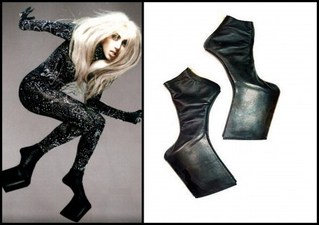
This was the easy part. Heelless shoes are all over the place these days, so I didn't have to look far for inspiration. You can buy heelless shoes pre-made [ready to wear] and go from there [I really regret not buying them, it would've saved time].
I've seen a few animal costumes that emphasis digiti-grade legs accomplished with special stilts. But I thought that was overkill, mostly because they add a lot of extra height [and look weird if you don't do it right]. So, I made my own hoof shoes with some platform boots. [These shoes are ridiculously hazardous to walk in]
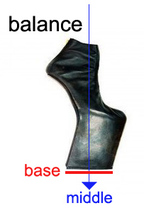
So, here's the trick behind my hooves, BALANCE.
The reason the heelless shoes seem impossible is because we think our weight lands in the heel. But, the higher the heel, the more weight goes to the toes.
The REAL trick is to get the location of the base directly under your center of gravity (so you don't rock backward). Check out the picture.>>
I've seen a few animal costumes that emphasis digiti-grade legs accomplished with special stilts. But I thought that was overkill, mostly because they add a lot of extra height [and look weird if you don't do it right]. So, I made my own hoof shoes with some platform boots. [These shoes are ridiculously hazardous to walk in]
So, here's the trick behind my hooves, BALANCE.
The reason the heelless shoes seem impossible is because we think our weight lands in the heel. But, the higher the heel, the more weight goes to the toes.
The REAL trick is to get the location of the base directly under your center of gravity (so you don't rock backward). Check out the picture.>>

|
Step 1.
Get some platform Boots. Break the heel off. I used a variety of tools to clamp/twist/saw the heels off. In case you're wondering there's nothing important in the heel. It's mostly plastic, with some short metal spikes gripping onto the heel of the shoe. I used a saw to get half way through, and then used pliers & screw driver to pry it off. [I also cut the platform base flat, but that's optional, I did it because the sole of the shoe was at an upward angle. I had a lot of problems trying to get it FLAT. You'll see, after I paint it, it'll be perfectly parallel with the ground. ] Step 2. Cut some wood into the desired hoof shape. I traced the bottom of my shoe onto the wood, added a half inch all the way around, and jig saw it out [and repeat]. Then sanded the edges into a smooth slope [from the toe to the base]. I stylized the back, so it sloped inward. I wouldn't have needed to sand so much if I used thinner wood with more layers. Height is optional, I regret making them soooo tall [even half of this height would have been plenty]. |
|
|
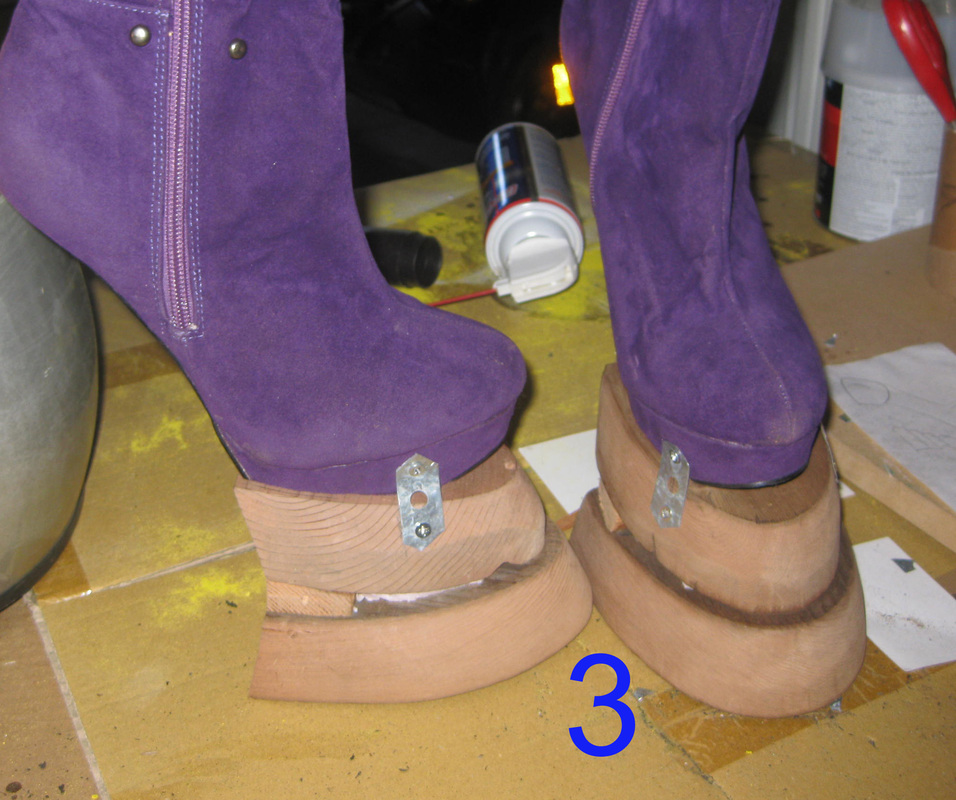
Step 3.
Bolt it all together. Screw/glue the pieces of wood together, and then bolt the shoes to the wood. There are 3inch screws going all the way through the wood to hold it all together. I used little pieces of galvanized steel hanger strap with small 1/2 inch screws to attach the shoe to the block. This is why it must be a platform shoe [There needed to be space at the sole for the screws]. The platform is all plastic, nothing important inside, you can screw whatever you want into it [it's hollow]. Secure the boot on all 3 sides [more attachment points are better]. I would also put a nylon strap [backpack strap] over the top of the toe and screw that in at both sides. [I did eventually have problems with the platform un-gluing from the sole around the toe]. |
|
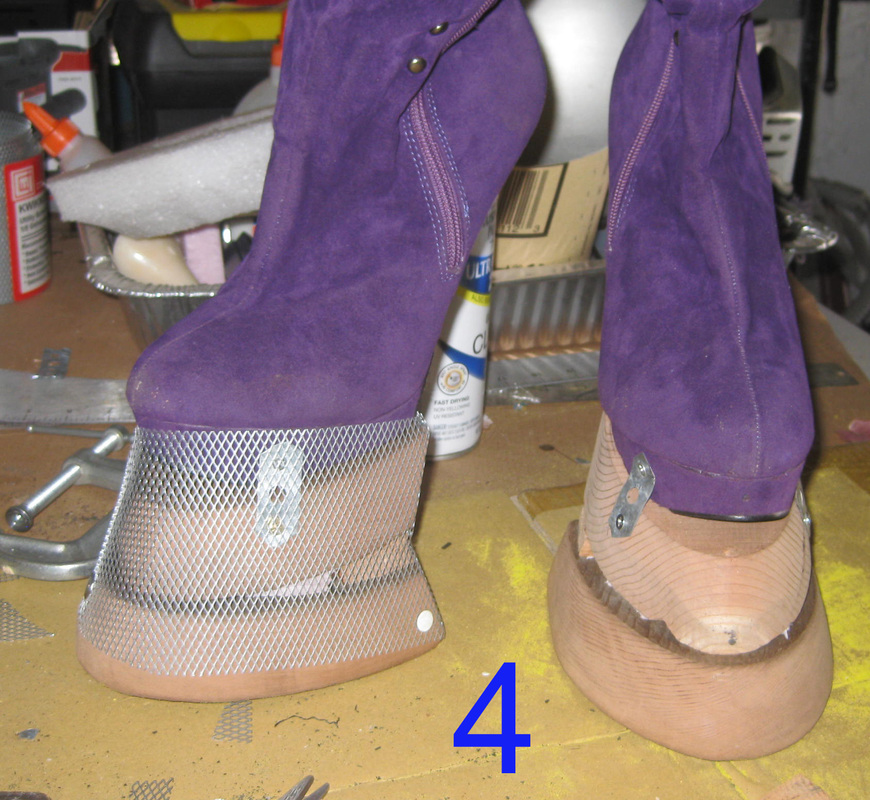
Step 4.
Gutter mesh [thin metal mesh that can be cut with scissors] I bent metal mesh around the whole thing, and used thumbtacks to attach it to the wood. The mesh is to cover everything up. Arrange the mesh right up to the bottom of the foot so the whole thing is smooth. The mesh makes the hoof surface nice and uniform [and hides any imperfections in the wood]. If you were aiming for a more 3D claw effect, you could always spray the whole thing with expandable foam and carve it into a more graphic shape. |
|
|
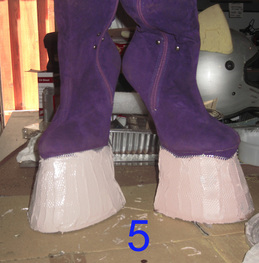
Step 5.
Bondo. Normally used for car body filler, Bondo has a texture like frosting, but is more like spackle/putty, it smells really bad and dries within 5 minutes. Mix it a little at a time, and apply it to the mesh. I used popsicle sticks/cardboard/putty knife to get it as smooth as possible. Once it dries, sand out all the little ridges. Sand, Bondo, repeat as needed. |
|
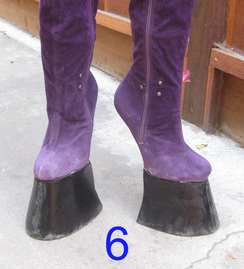
Step 6.
Paint. All the screws/wood/mesh are now hidden. After sanding the Bondo smooth, we are free to paint it whatever color you want. Black looks nice. So does brown. That's about it for the actual hooves. They add about 7 inches in height, so I'm crazy tall. Also, [since they are solid wood] They are heavy. I recommend using light weight wood/material, because the extra weight makes walking difficult. |
|
|
Step 7.
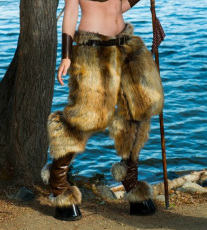
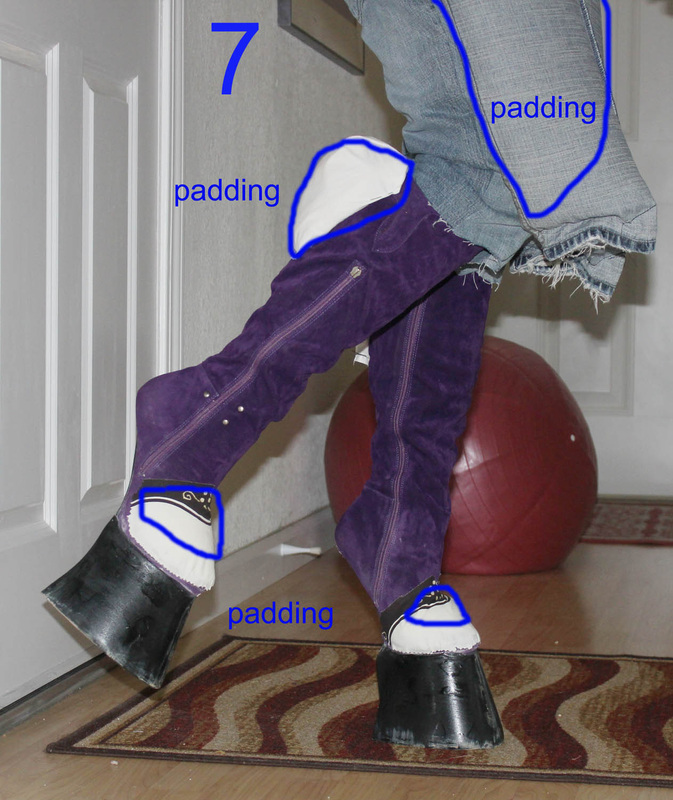
Padding. I've seen costumes that have thin stick legs [they don't look as good as the curvy ones]. I used big chunks of upholstery foam to make thigh pads, then triangular chunks to make calf pads, then little pieces on tops of my toes. Stitch/glue it onto the boots and pants. The pants are just an toss away pair of jeans. I cut them off at the knee, and stuffed the foam into the pant leg [like a bag], and stitched it onto the jeans at the top and bottom. Try it on. Make sure you like the shape. I trimmed the knee piece after this photo was taken to make it more rounded. |
|
Step 8.
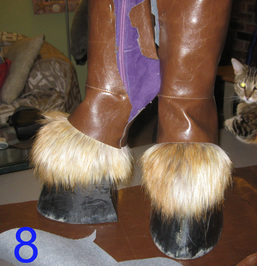
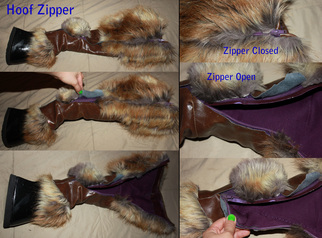
Fur. Fabric glue is your best friend & faux fur is expensive. This fur was $28 a yard, so I bought 1 yard and used it wisely. Be careful cutting it [there IS a trick, but you'll always end up with little fur bits going everywhere anyways]. I used fabric glue to do a lot of the attaching to the shoe itself, and when it was all glued on I did some stitching by hand around the zipper and at the top. The fluffy fur disguises the toe of the shoe. The boot cuff is vinyl, it gives me a nice slender ankle. |
|
|
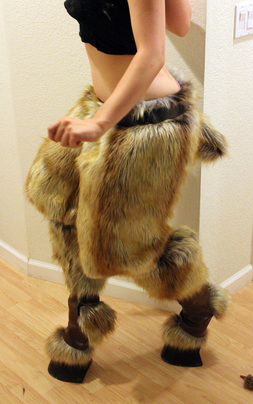
That's about it!
Just a few more finishing touches. Some paint and props finish the costume. The belt is just decorative, I needed something to hook a purse/flute to. I punched holes into it [at the back and sides] and stitched it onto the pants, so it wont slide around. The pants and hooves are separates. I thought about attaching them together behind the knee [in the event that the boots slid down when wearing them]. But I snugged up the top of the boot instead. It's a little easier to get them on that way. In the end, I glued some rubber mat to the bottom of each shoe [for traction], and walked with a large staff [for balance]. The Bondo & sanding took the most time, and painting to completion only took a weekend. It's hard to believe that it only took 1 yard of fur to cover the whole thing. Please be careful walking around in these, they are way MORE dangerous than walking around in regular heels. Feel free to ask questions. -Elisa |